
Admins
Add the people who work in your dashboard, choose what each of them can see and do, limit an admin to some locations, and resend or remove an invitation.
Admins lists everyone who signs in to your dashboard, and what each of them may do. Use it to invite a colleague, narrow what they see, or remove their access.
At a glance
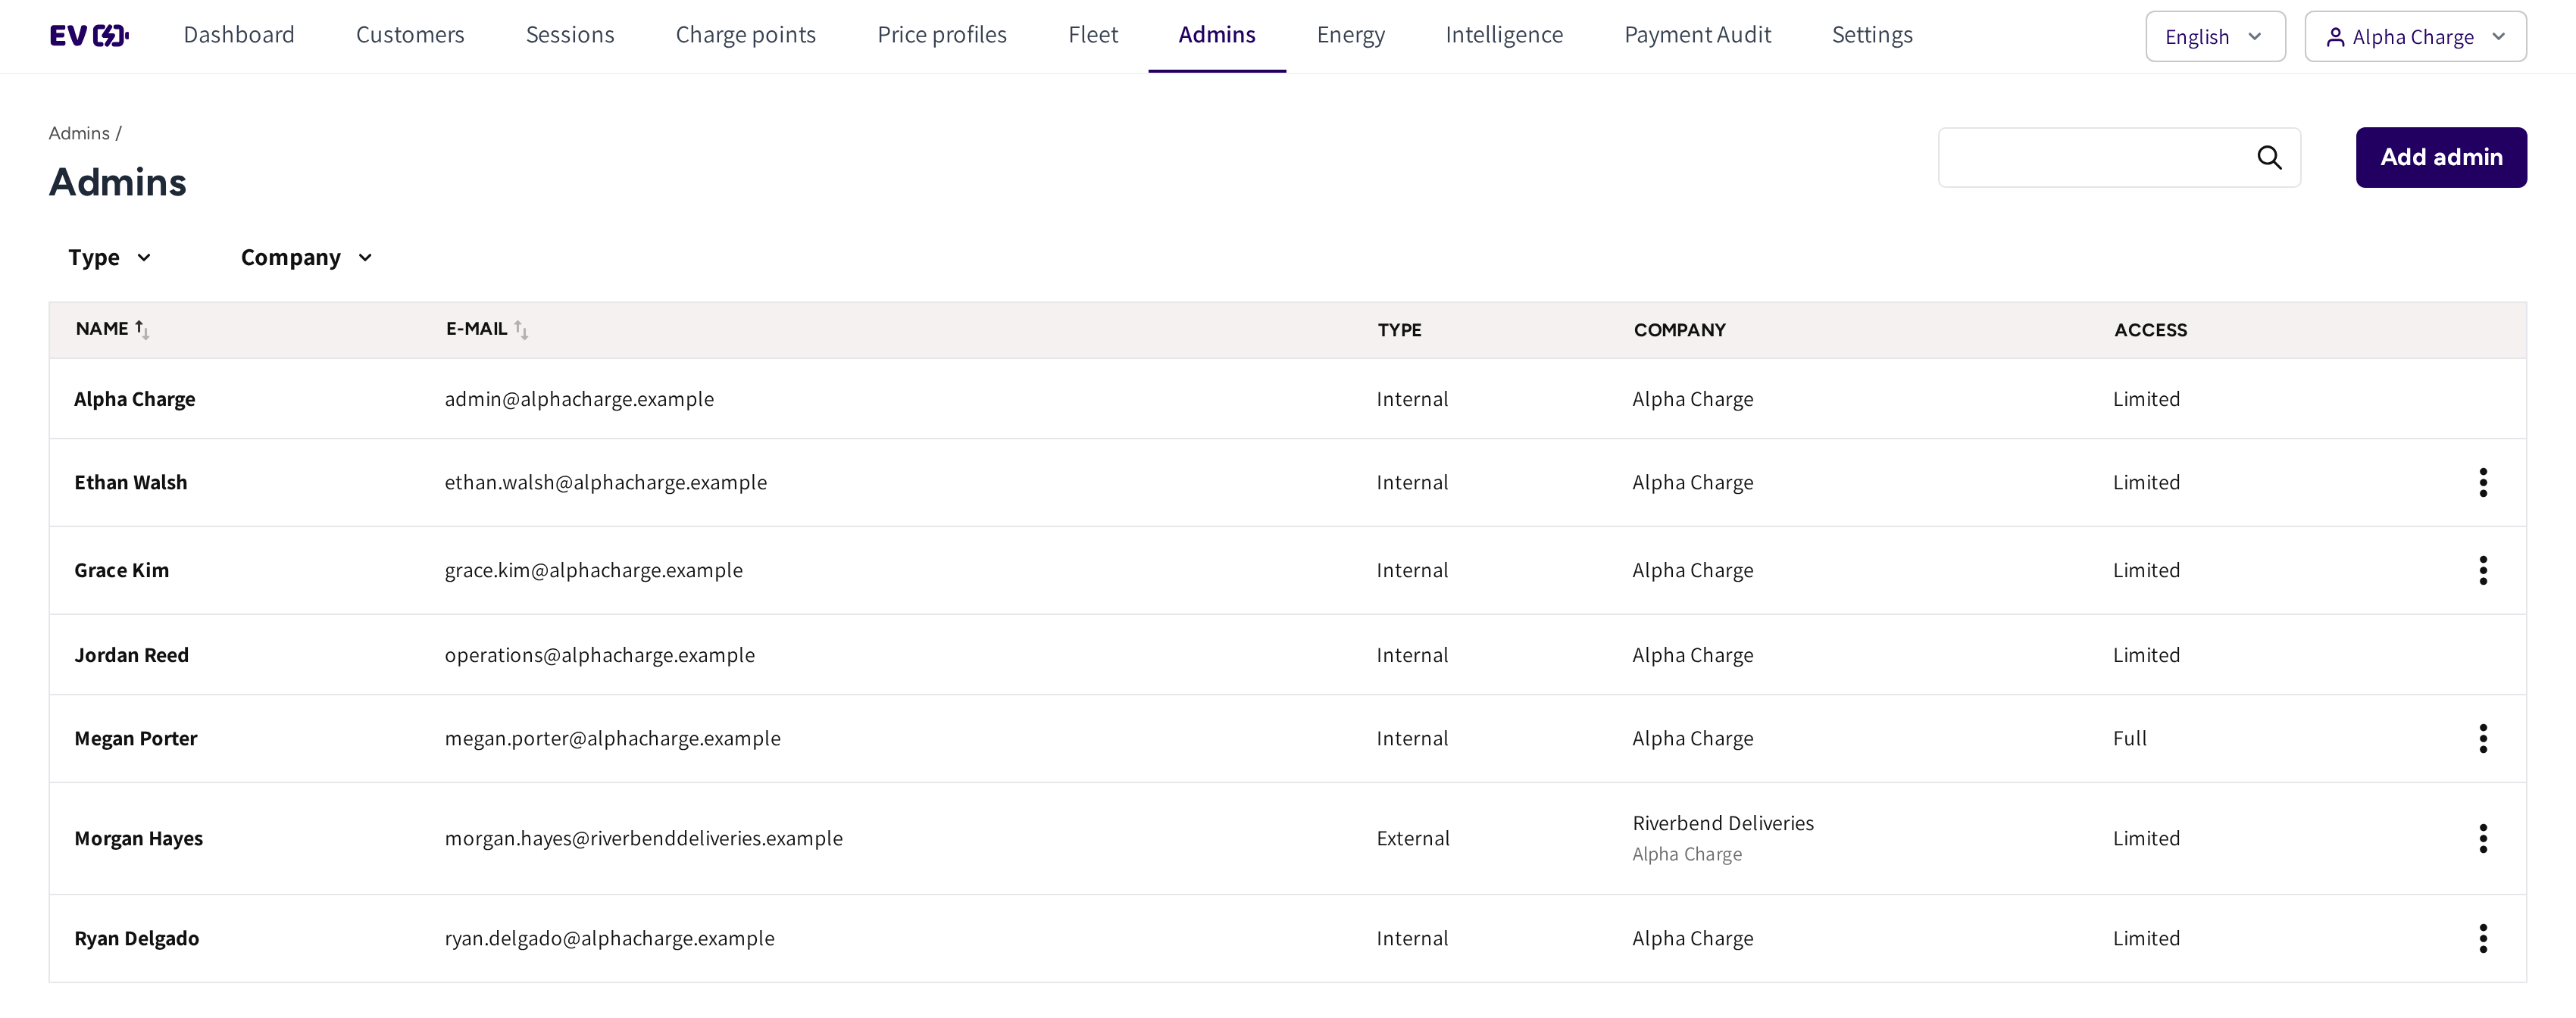
- Type and Company: filter the list by kind of admin or by company. The search box finds an admin by name, email or company.
- Add admin: opens the Create Admin form.
- Name and E-mail: who the admin is and the address they sign in with.
- Type: Internal for your own team, External for the administrator of a fleet customer.
- Company: the company the admin belongs to. An external admin shows their fleet company with your company under it.
- Access: Full when the admin holds every section and action, Limited when some are switched off.
- The row menu: Edit, Resend Invite while the invitation is open, and Delete.
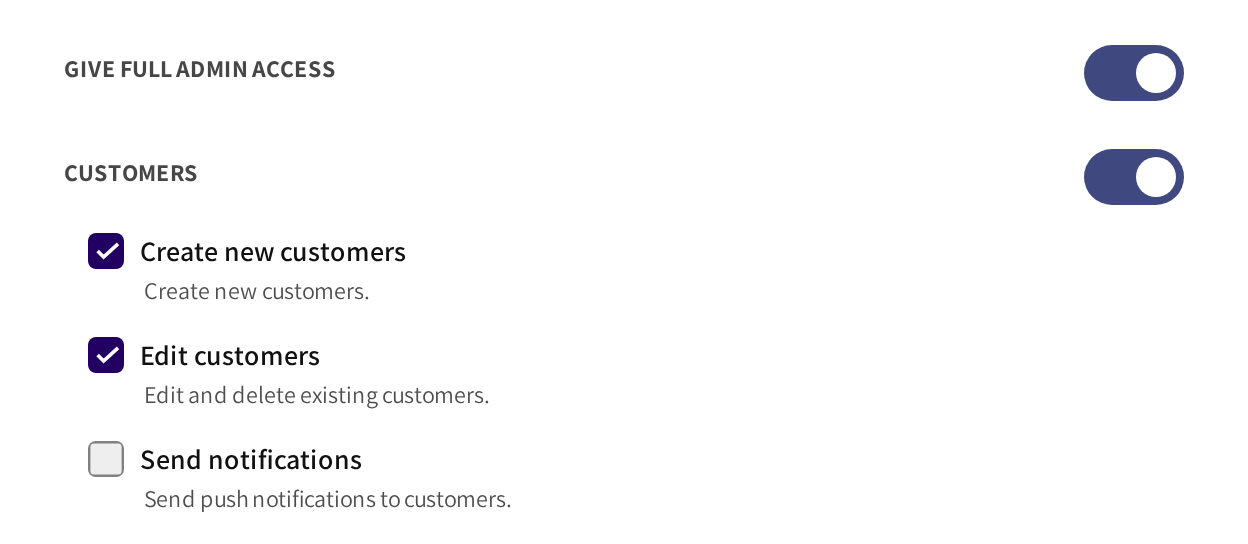
- Give full admin access: every section and action you may hand out, in one switch.
- One switch per section, such as Customers, with the actions inside it as boxes.
Add an admin
- Click Add admin.
- Under Admin type, choose Internal for your own team or External for a fleet customer's administrator.
- Enter the First Name, Last Name and Email.
- Set what the admin may do under Access settings, see below.
- Click Save.
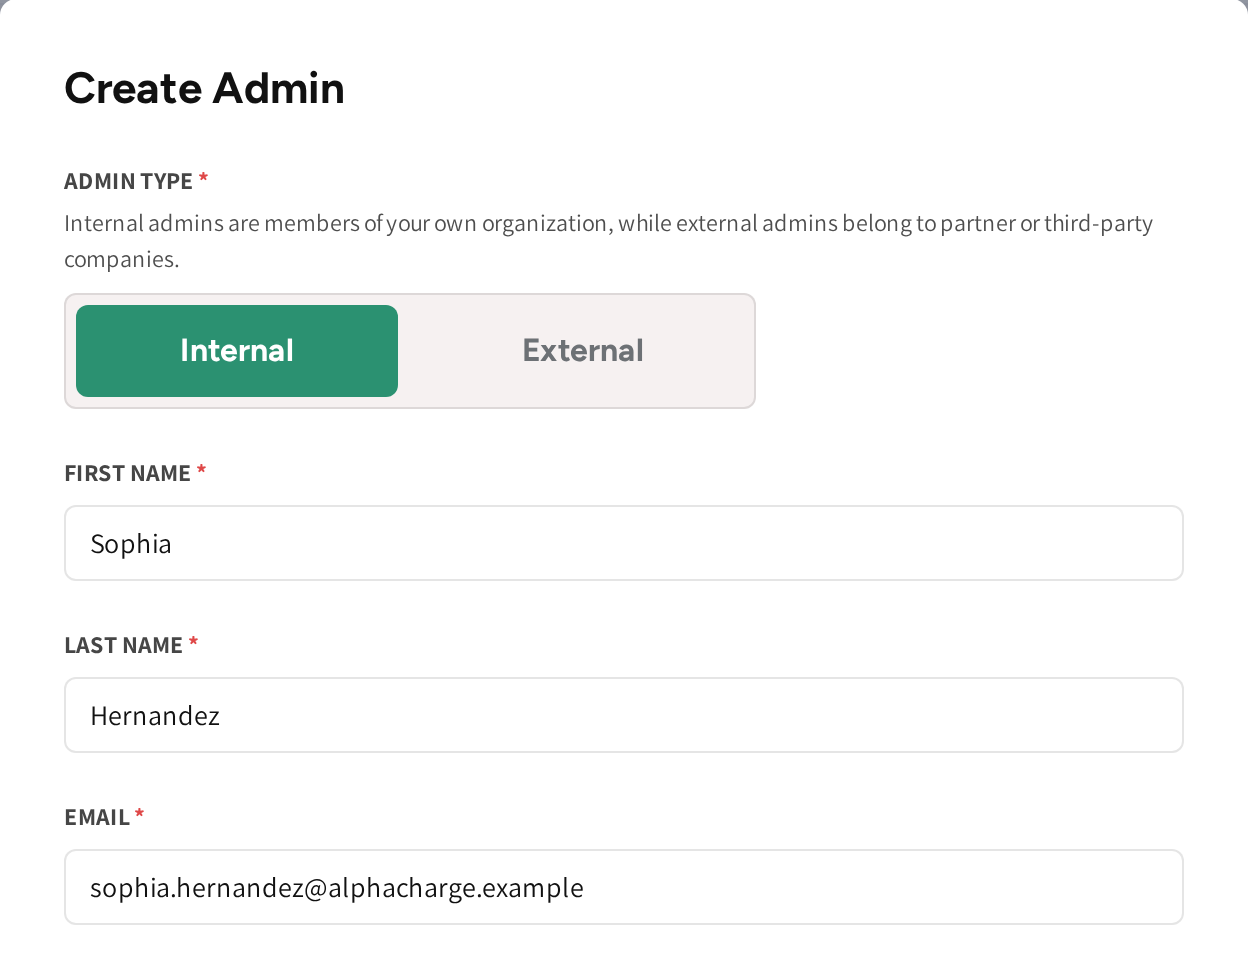
The admin gets an invitation email and signs up from its link. Until they do, the row menu offers Resend Invite.
If you choose External, then the form asks for the External CPO: the fleet company the admin belongs to. That admin only sees their own company's fleet, see Admin permissions.
Choose what an admin can do
A new admin starts with everything you may hand out. Switch off what they do not need:
- Switch a section off to hide it from their menu.
- Leave a section on and untick its actions, for example Create new customers, to let them look without changing anything.
- Switch on Give full admin access to hand over everything again.
You can only hand out what your own account holds. A box you cannot give is shown greyed out.
Limit an admin to some locations
- Open the admin's row menu and click Edit.
- Under Charge points, tick Limited access to locations.
- Pick the locations the admin may see.
- Click Save.
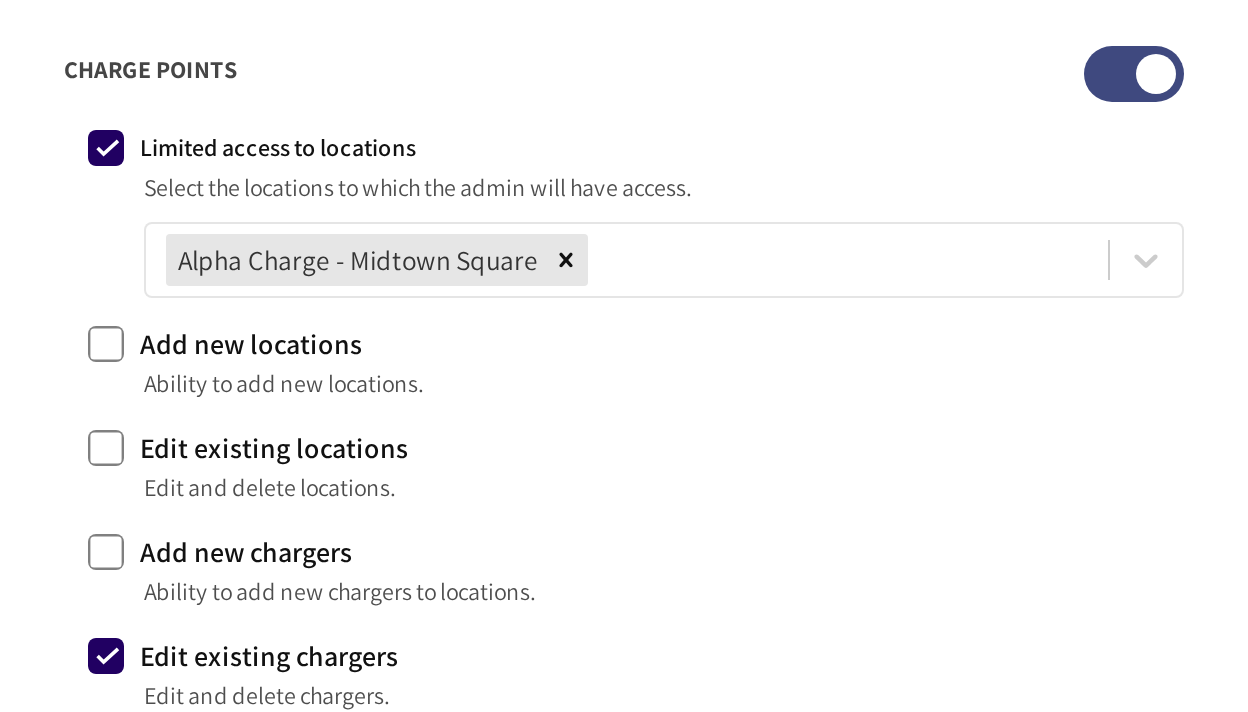
The admin then sees only the chargers, sessions and data of those locations. This suits a site host or a colleague who looks after one site.
Edit or remove an admin
The row menu offers:
- Edit: opens the admin in the Edit Admin form.
- Resend Invite: sends the invitation again to someone who has not signed up yet.
- Delete: removes the admin. Their access ends at once.
Your own role and permissions can only be changed by another admin. If an admin holds more than you do, then their row has no menu for you.
Common questions
How do I give someone access to only one location? Edit the admin, tick Limited access to locations under Charge points and pick that location. Everything they see is then limited to it.
What is the difference between an internal and an external admin? An internal admin is part of your own team. An external admin is the administrator of one of your fleet customers and only sees that company's fleet.
What if someone never received their invitation? Open the row menu and click Resend Invite. Check the address as well, and look it up in Email delivery.
Why does an admin not see a page? Their access leaves that section switched off. Edit the admin and switch the section on under Access settings.
Why is there no menu on some rows? You cannot change your own account, or an admin who holds more than you do. Ask an admin with more access to make the change.
Updated 11 days ago