
Account Registration & Setup
Use this guide to register your EOSVOLT account, upload your company logo, and add billing information before you start managing chargers.
🔗 Registration Page
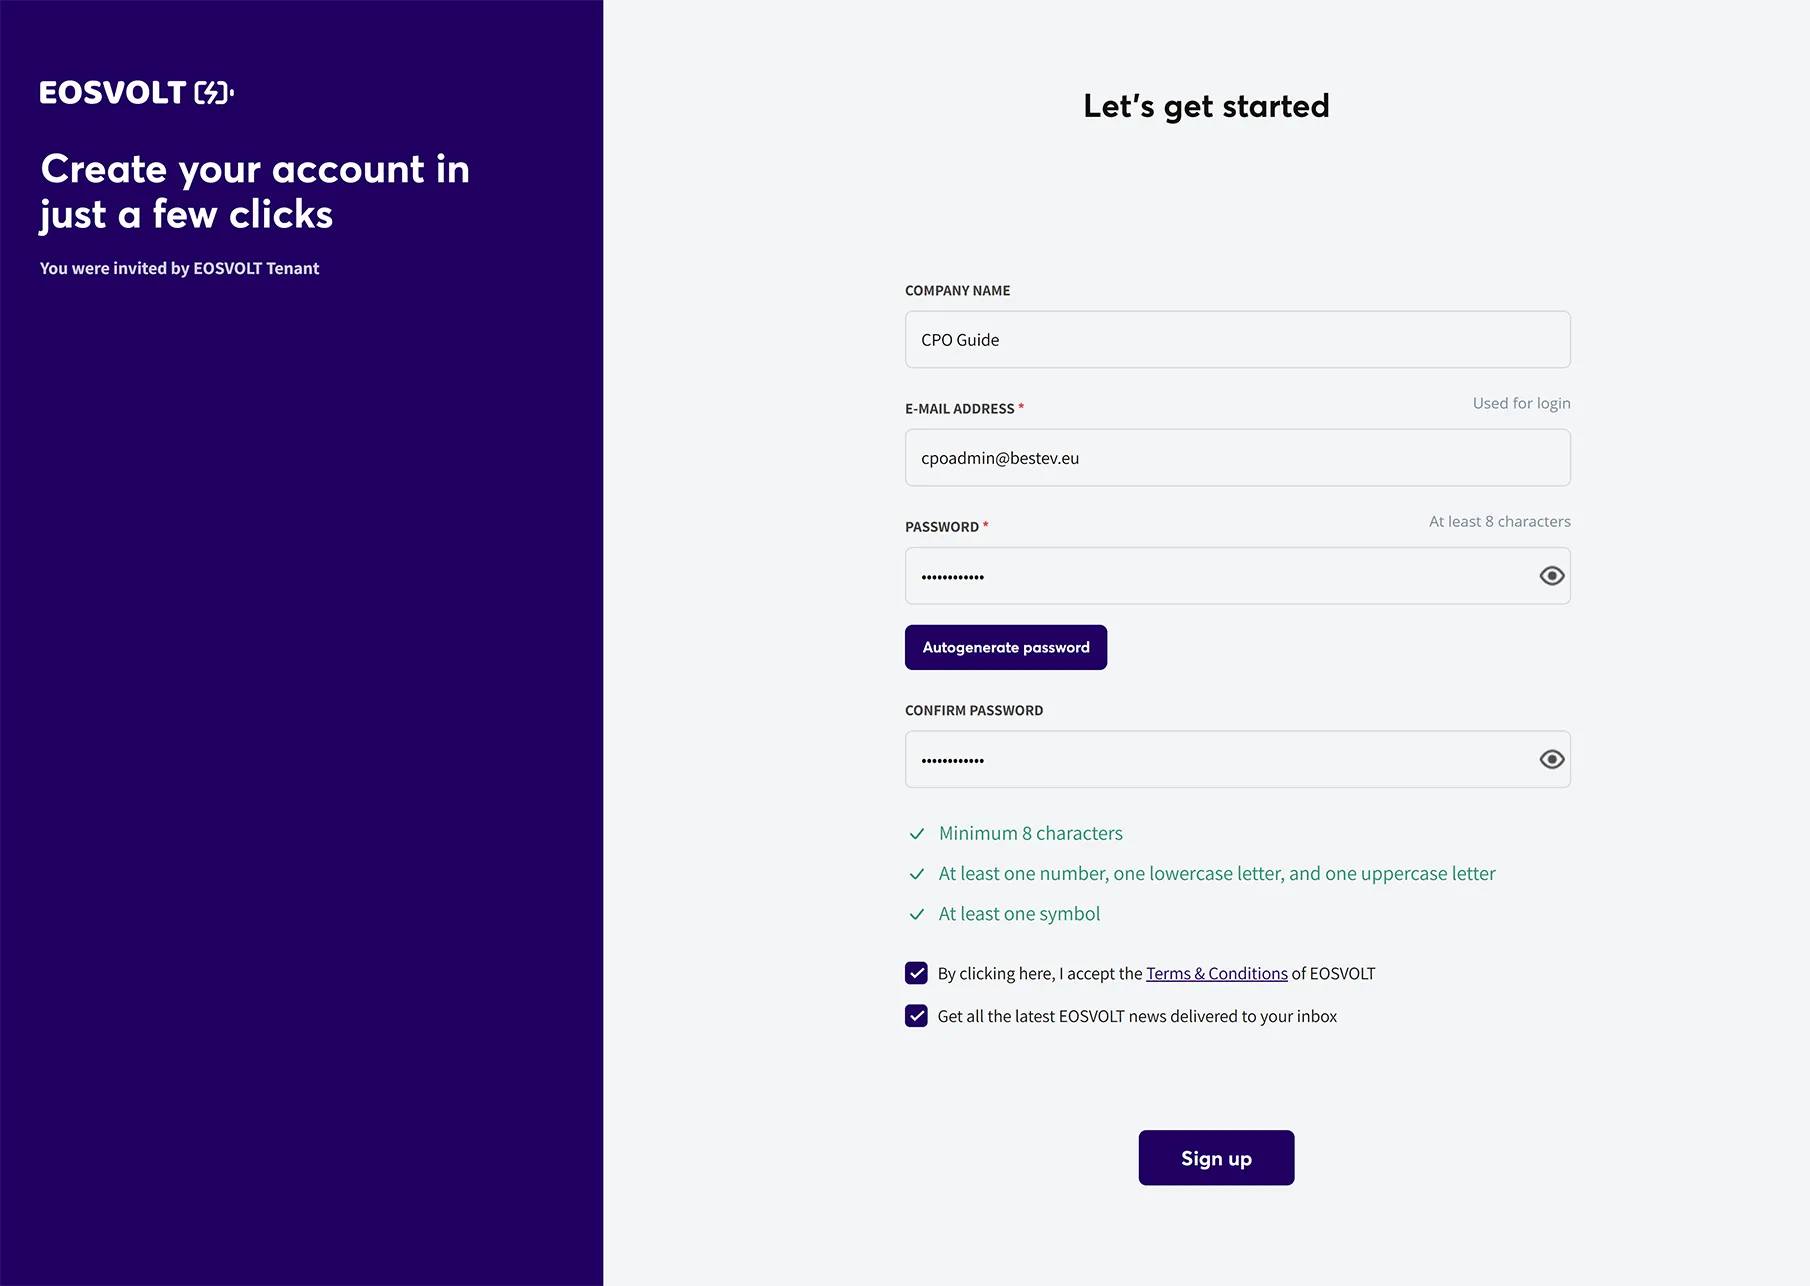
Click the invitation link sent to your email.
You’ll be taken to the registration page where you’ll set up your account.
NoticeThe email you enter during registration will be used as your login ID. It can be different from the email address where you received the invitation.
After successful registration, you’ll be directed to your dashboard.
At first, the dashboard will appear empty — it will populate automatically after your first transaction is registered on one of your chargers.
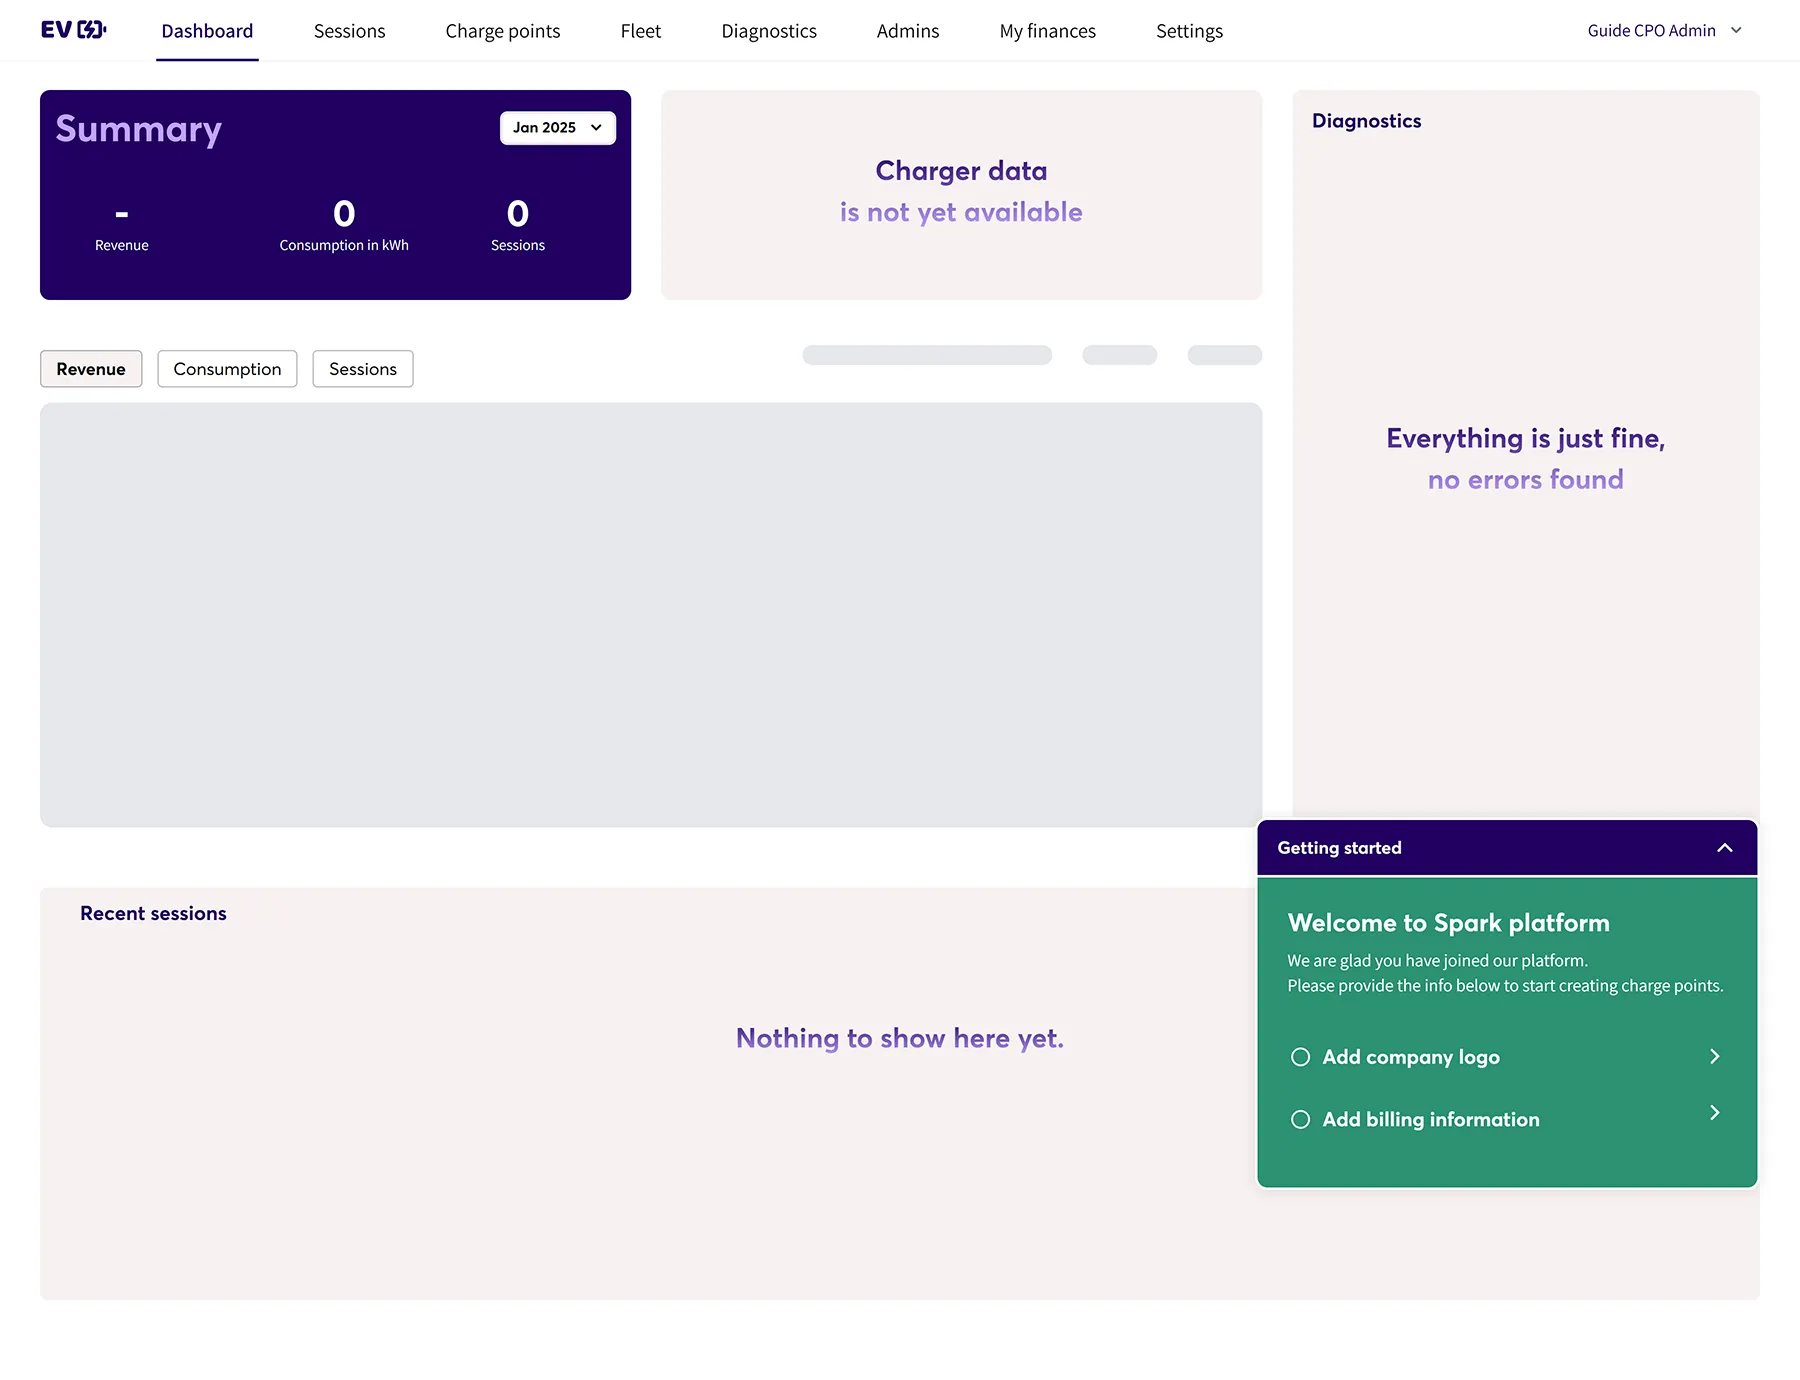
Before creating your first charge point, make sure to:
- Upload your company logo
- Add your billing information
You can do both directly from your dashboard using the corresponding action buttons.
🏢 Add Company Logo
Your company logo will appear on invoices issued to your customers for charging sessions.
Recommendation:
- Use a square image (400 × 400 px) for the best display quality.
- Upload the logo under Settings → Company Info → Logo.
💳 Add Billing Information
From your dashboard:
- Click the green “Add Billing Information” button
or navigate to Settings → Billing. - Fill in all your company billing details (company name, address, VAT/Tax ID, bank account, etc.).
- Review carefully — this information is used to process your payouts.
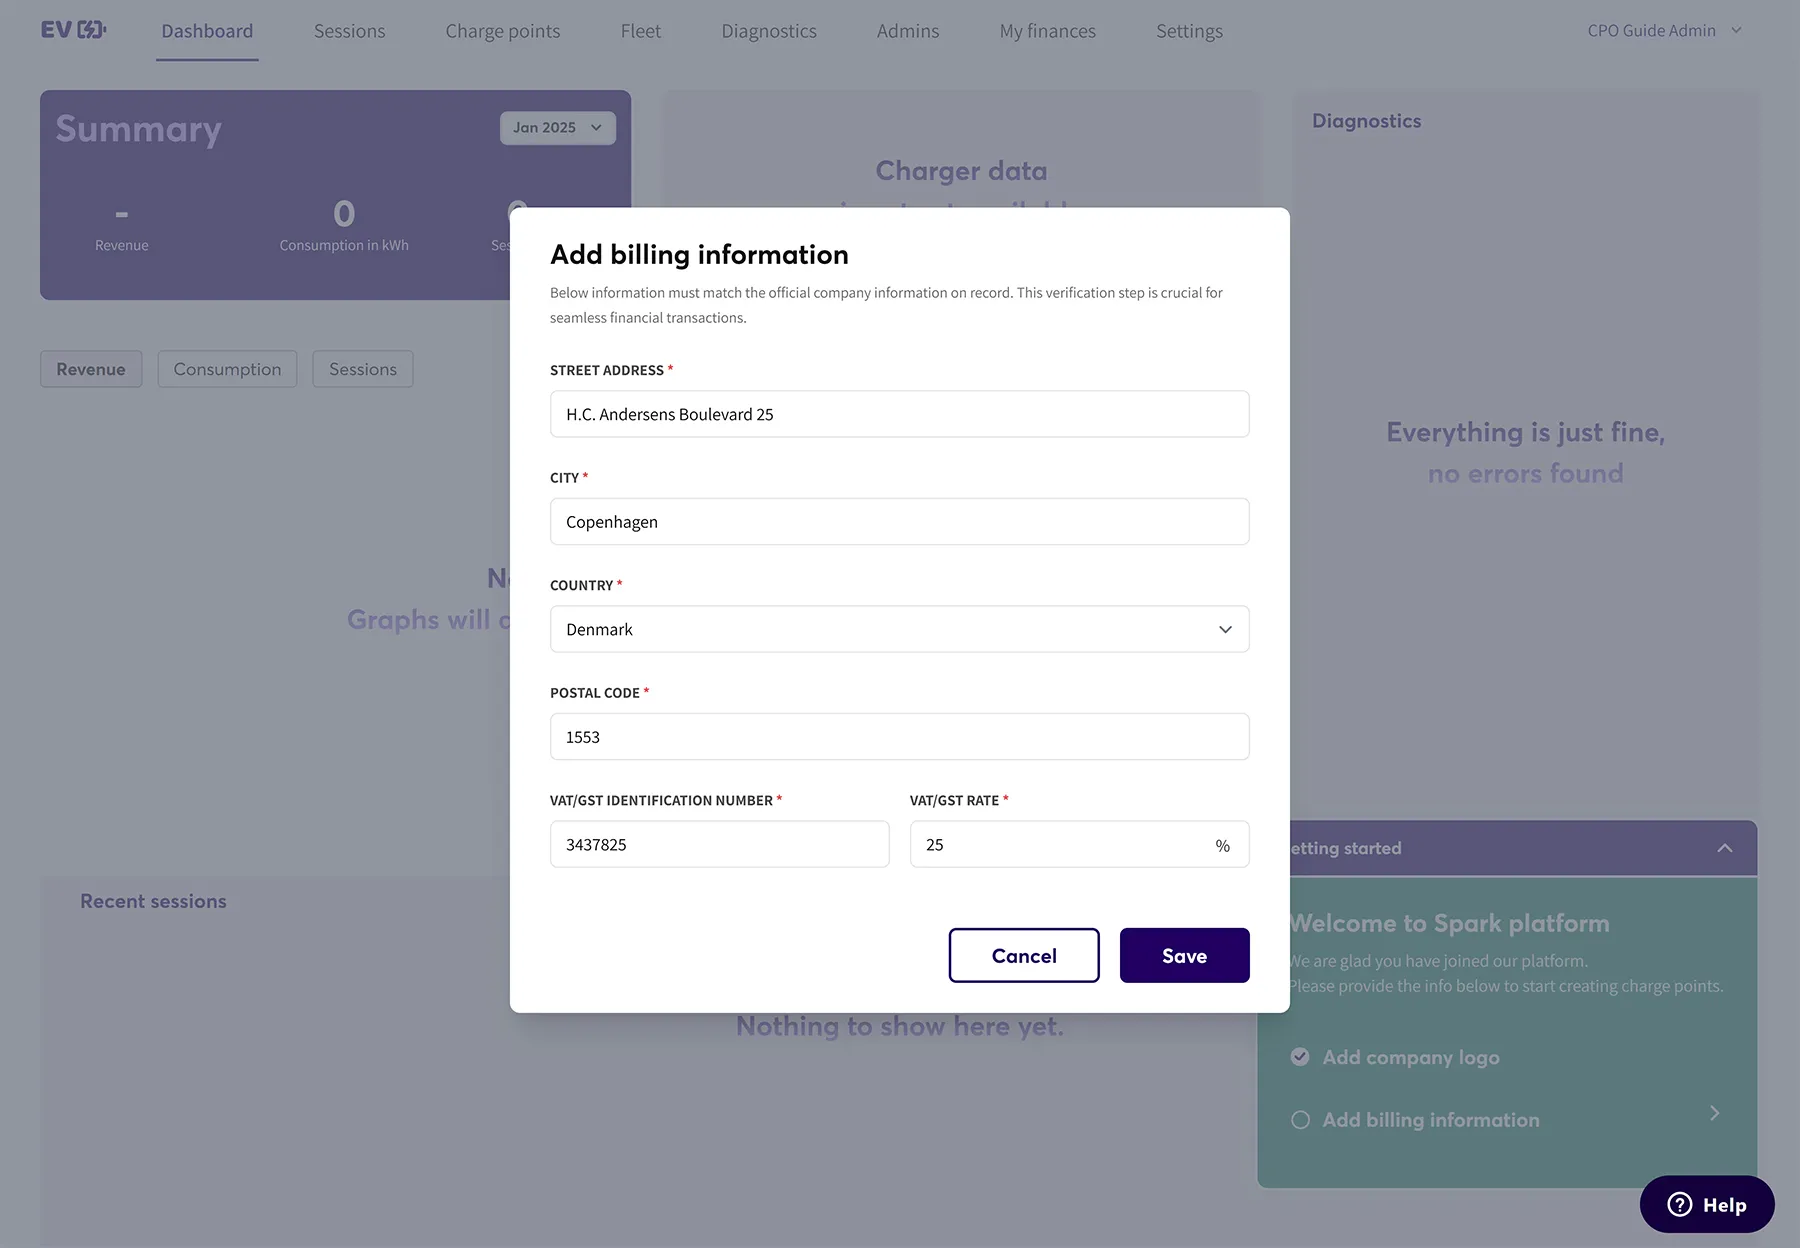
Keep it updated:Always ensure your billing information is accurate and current to avoid payout delays when triggering a withdrawal.
✅ After Registration
Once registration, logo upload, and billing setup are complete:
- Create your first charge point.
- Start a test session to confirm reporting.
- View live data and transactions in your dashboard.