
Creating a location
Create a charging site step by step: its name, type, price profile, idle fee, address, support contact, opening hours, amenities, image and app visibility.
A location holds your chargers, so you create the site first and add its chargers after. The form sets what drivers pay, where they find the site and whom they contact.
At a glance
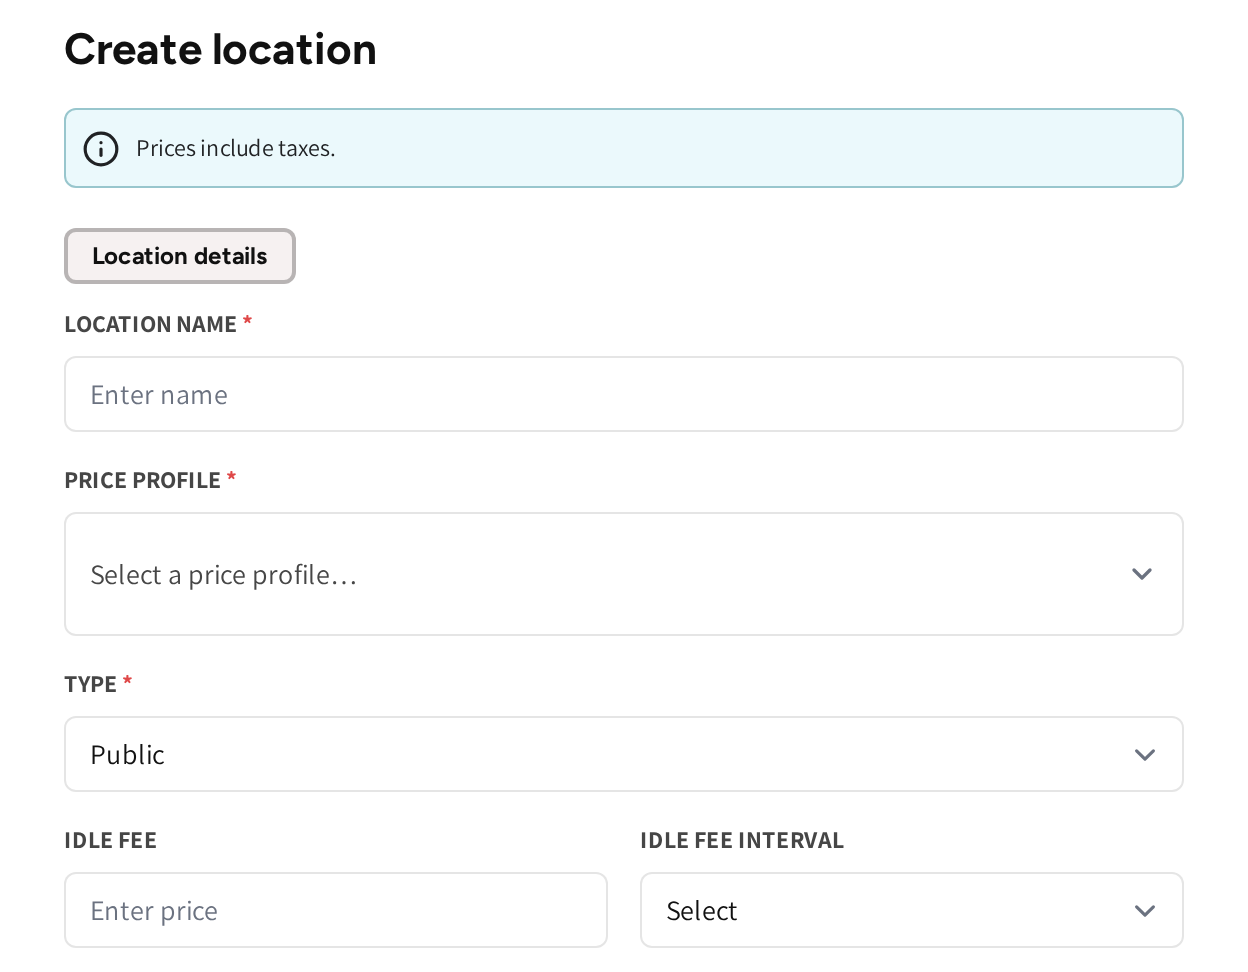
- The note at the top: whether the prices you enter include taxes.
- Location name: the name drivers see in the app.
- Price profile: what charging costs at the site.
- Type: Public or Semi-public.
- Idle fee and Idle fee interval: what a vehicle pays for staying plugged in after charging.
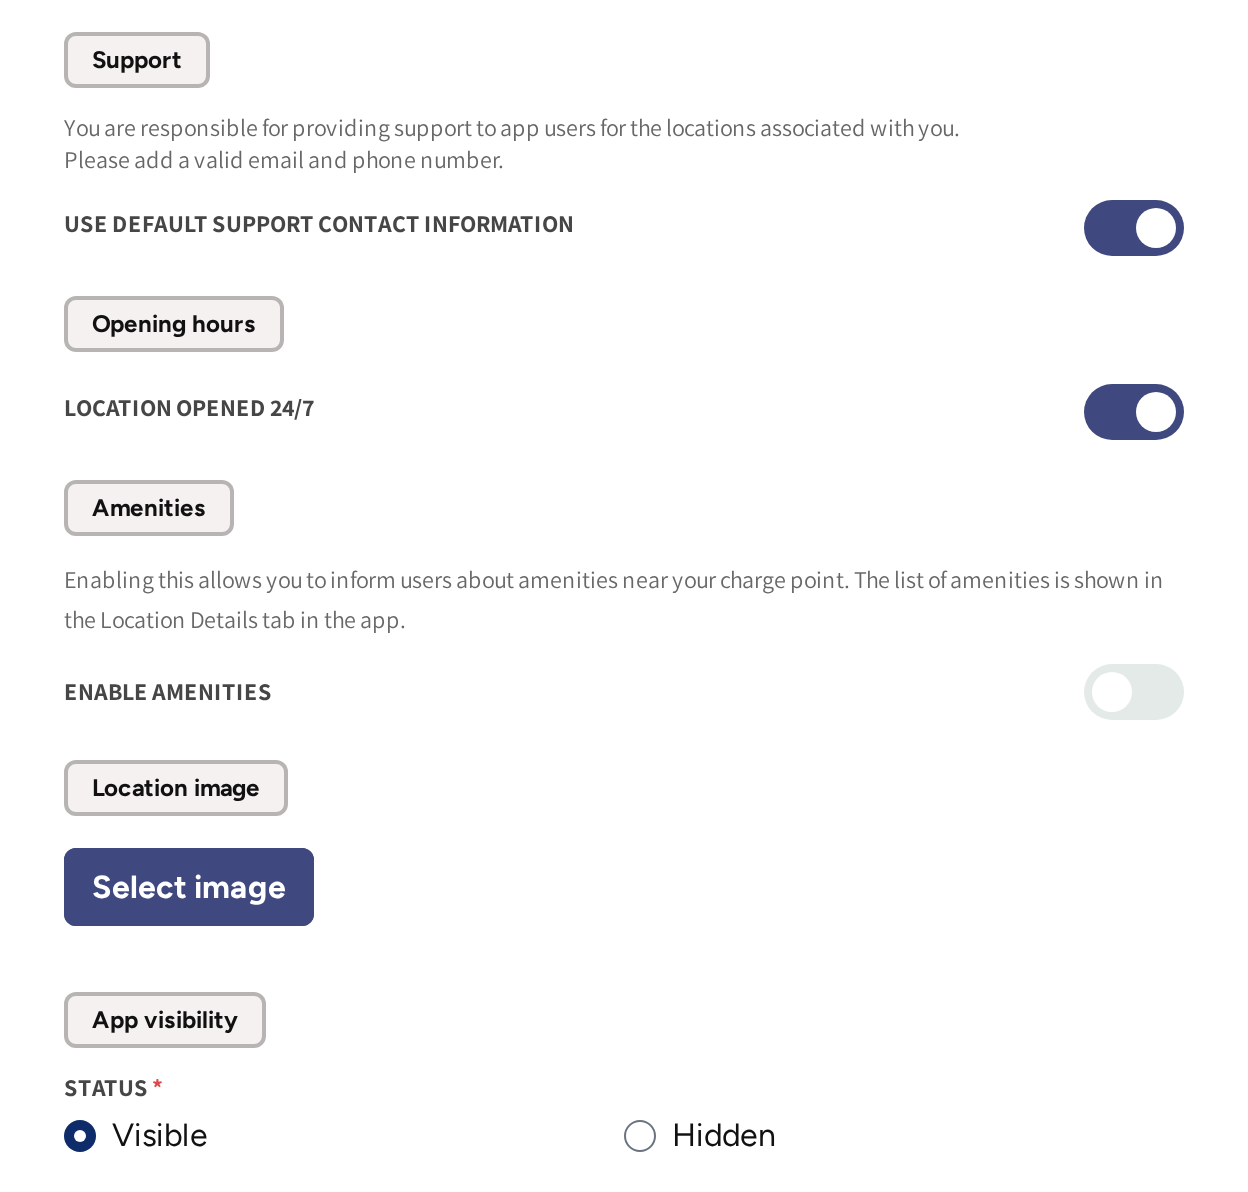
- Support: the contact details drivers get for this site.
- Opening hours: open 24/7, or the hours per day.
- Amenities: what drivers can do nearby.
- Location image and App visibility: the photo in the app, and whether the site shows on the map.
Create the location
- Go to Charge points → Locations.
- Click Add location.
- Fill in the form, from Location name down to App visibility.
- Click Save.
If your account manages several operators, then the form starts with Operator, where you pick whose site it is.
The location opens on its own page. It shows on the map in the app once it has at least one charger, see Adding a charger.
Name and type
The Location name is what drivers see in the app, so use the name they know the site by.
| Type | Who sees and uses the site |
|---|---|
| Public | Every app user sees the site and can charge there. |
| Semi-public | Only drivers you grant access see the site and can charge there. |
Everything else works the same for both types. At a semi-public site, access comes from fleet teams and member discounts, see Teams & Member Discounts. They can cover the whole site or single chargers.
Set the price
If price profiles are part of your account, then Price profile is a required field and the form has no price field of its own.
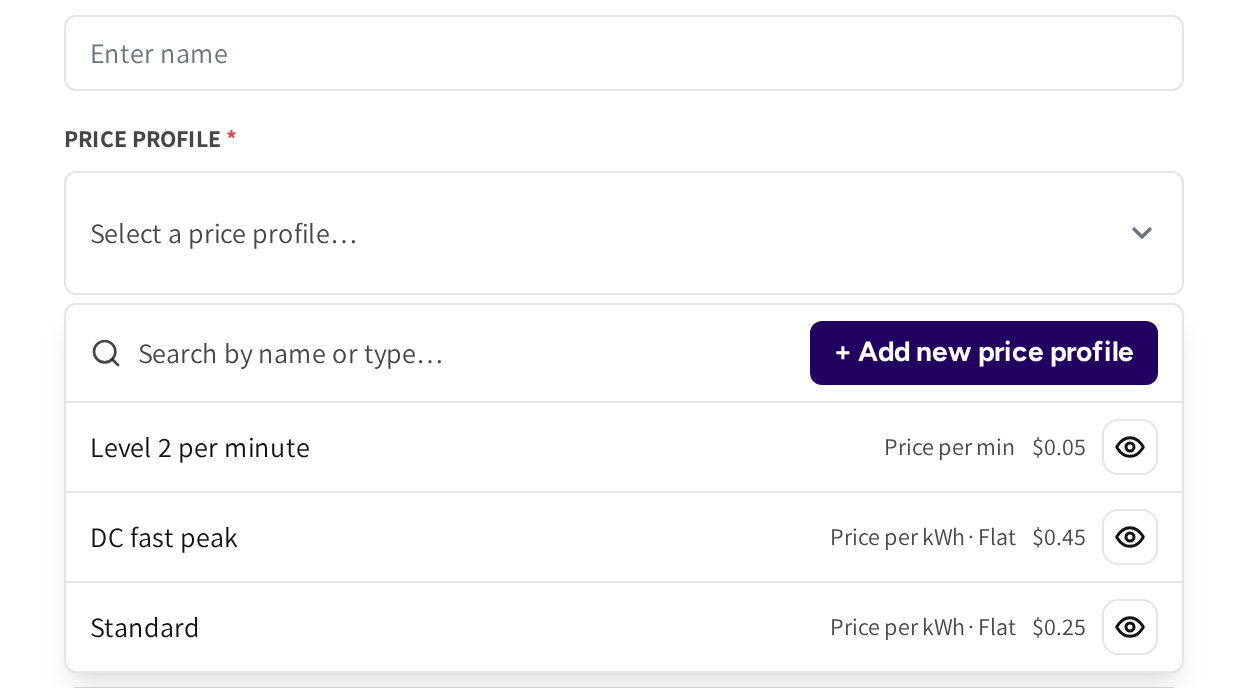
- Open Price profile to see your profiles, each with its type and the price that applies right now.
- Type in the search box to find one by name or type.
- Click Add new price profile to create a profile without leaving the form. It is selected for you once you save it.
- Click the eye icon to check a profile's rules before you pick it.
Every charger at the site follows the location's profile, unless the charger has a profile of its own. Each price profile is managed in Price profiles.
If price profiles are not part of your account, then you set the price on the location itself:
- Pricing strategy: Pay per kWh, Pay per minute or Pay per hour.
- Main Price per kWh: the price for each unit. The label follows the strategy you picked, for example per minute.
- Set custom pricing: a different price for set hours of the day. Hours without a block use the main price.
Set an idle fee
An idle fee keeps vehicles from blocking a plug after they finish charging.
- Idle fee: the amount charged for each interval.
- Idle fee interval: 5, 15, 30 or 60 minutes. Each full interval after charging ends adds one fee.
For example, $0.50 with a 15 minute interval costs $0.50 at 15 minutes and $1.00 at 30 minutes. It stops when the driver unplugs. Drivers see the fee in the app before they charge, and get a notification when it starts.
If a plug on a private charger should never charge an idle fee, then turn on Skip idle fee for that plug, see Private chargers.
Address and timezone
- Street address, Postal code, City and Country: the address drivers see in the app.
- Map: the pin is placed from the address, and you can drag it to the exact spot.
- Latitude and Longitude: the pin's position, filled in for you.
- Timezone: the time of the site. Opening hours, custom prices and bookings follow it.
If your account has no tax ID and tax rate yet, then the form asks for them under Tax identification number. They are saved to your account, and you can change them later under Settings.
Support contact and opening hours
- Use Default Support Contact Information: on, the site uses your company's support details. Turn it off to enter an email, a phone number and another channel for this site only.
- Location opened 24/7: on, the site is always open. Turn it off to set the hours per day, and leave a day empty when the site is closed.
The support details you enter for your first location become your company default. You can change the default under Settings.
Add amenities
Turn on Enable amenities to tell drivers what they can do nearby while they charge. Drivers see them on the location in the app, and can filter the map by the built-in ones.
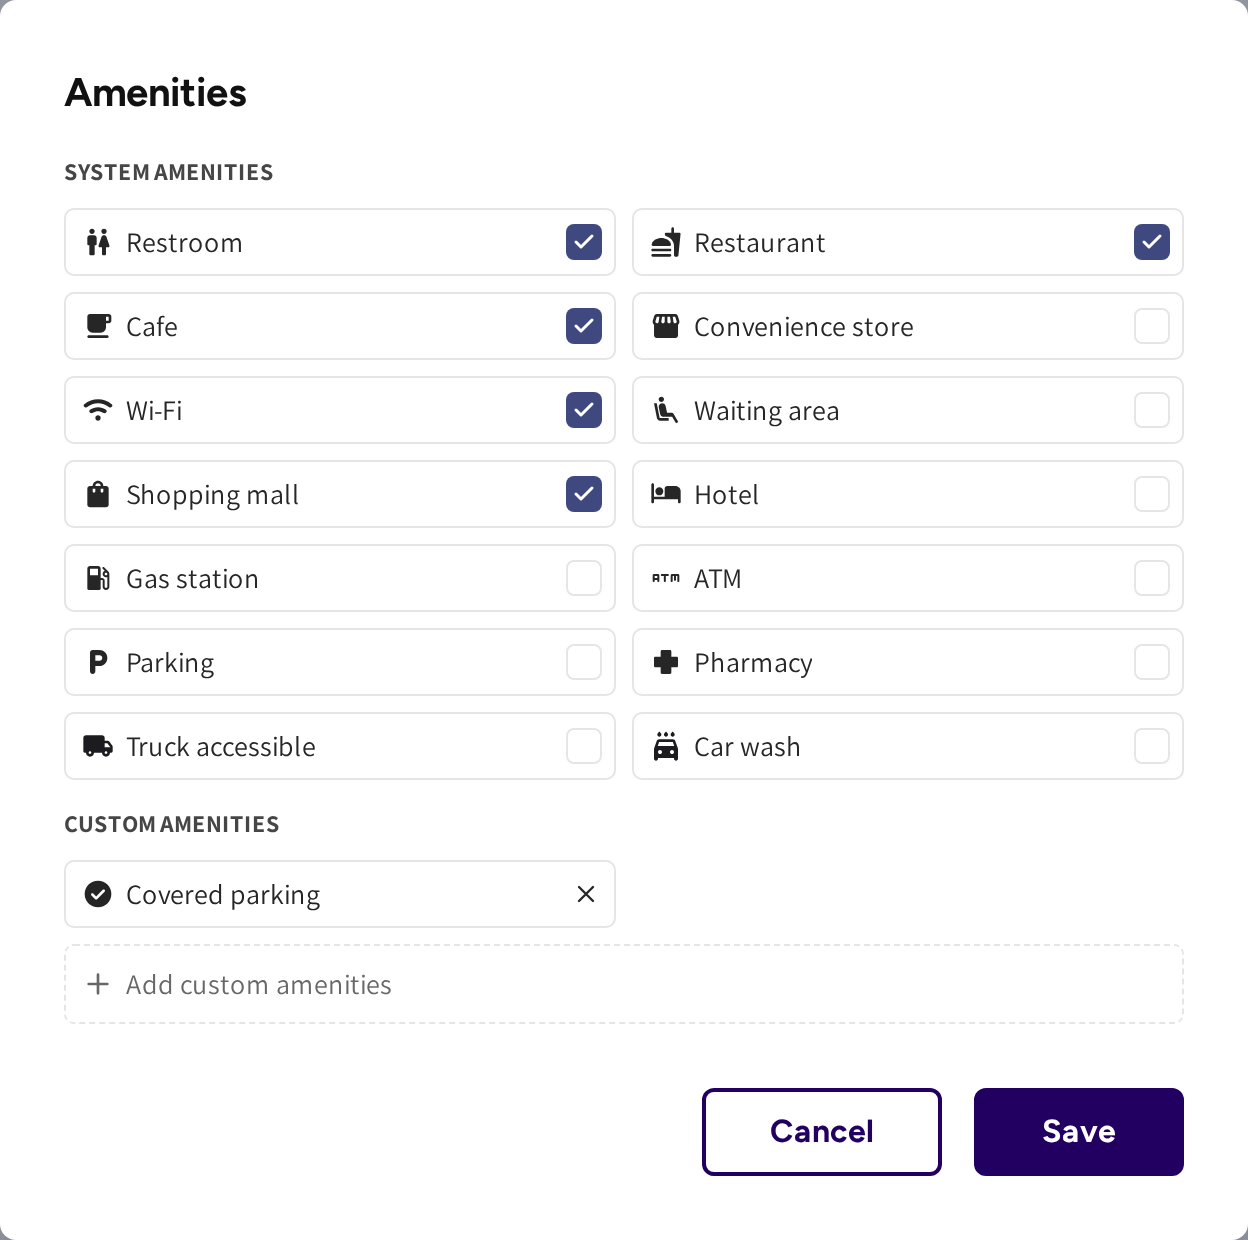
- System amenities: tick any of the 14 built-in ones, from Restroom to Car wash. Each has its own icon in the app.
- Custom amenities: add up to 6 of your own, such as a dog park, up to 26 characters each. Press enter to add one.
Amenities are optional. You can add or change them later with Edit on the location's Amenities section.
Image and app visibility
- Location image: click Select image to upload a photo. It helps drivers find the chargers, for example in a large parking area.
- App visibility: Visible shows the site in the app. Hidden keeps it off the map and out of search. Drivers with a link or QR code can still charge there.
Common questions
Why is my location not on the map in the app? A location shows on the map once at least one charger has been added to it. Also check that App visibility is Visible.
What is the difference between public and semi-public? A public site is visible to every app user. A semi-public site is only visible to the drivers you grant access, and everything else works the same.
My form asks for a price profile and has no price field. Where do I type the price? In the price profile itself. Pick a profile, or create one with Add new price profile, and the site follows its prices.
When does the idle fee start? After charging ends and one full interval has passed. It then repeats every interval until the driver unplugs.
Can I add amenities later? Yes. Open the location, click Edit on the Amenities section, and pick from the built-in list or add your own.
Updated 24 days ago